Native Applications
Below we identify how to use an off-the-shelf application to access the data.
First you should start from your developer portal. You can reach this as a patient via your patient portal, then under security there should be an option for developer portal.
As a provider, you can reach it via your Medpointe desktop app and selecting Options > System Options > Token Management. As a community or developer, you can log into the portal.
Under the options, pick Link Confidential Client. We will use a free, third party application called Postman (https://www.postman.com/downloads/) This tool can pull data from many web applications.
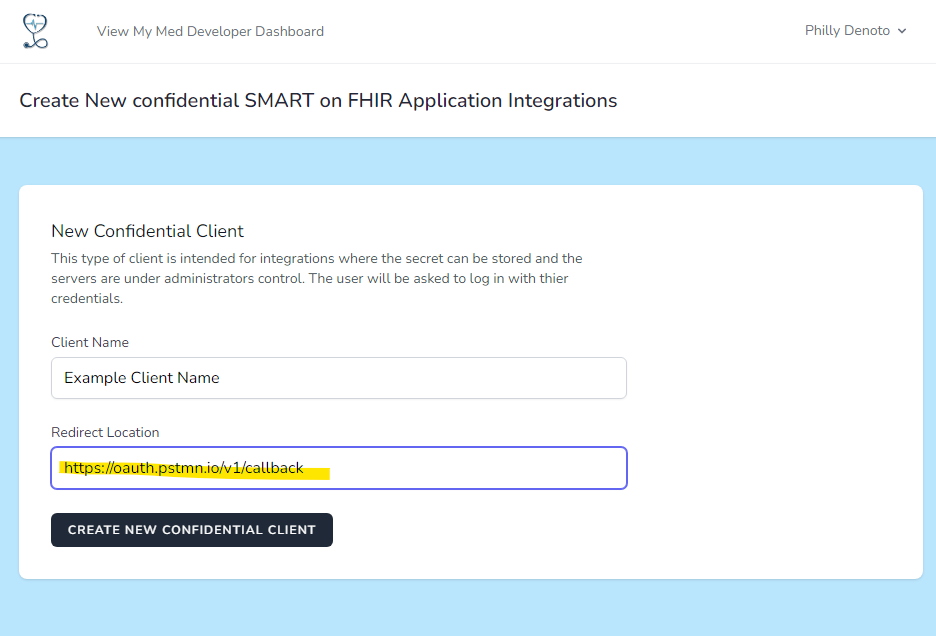
You may select whatever name you want to call your application. Since we are using Postman, the URL to post a callback to is https://oauth.pstmn.io/v1/callback. This URL be where your users will go after they have been logged in.
In the example below, we're showing the process as if you were a patient logging in from the patient portal.
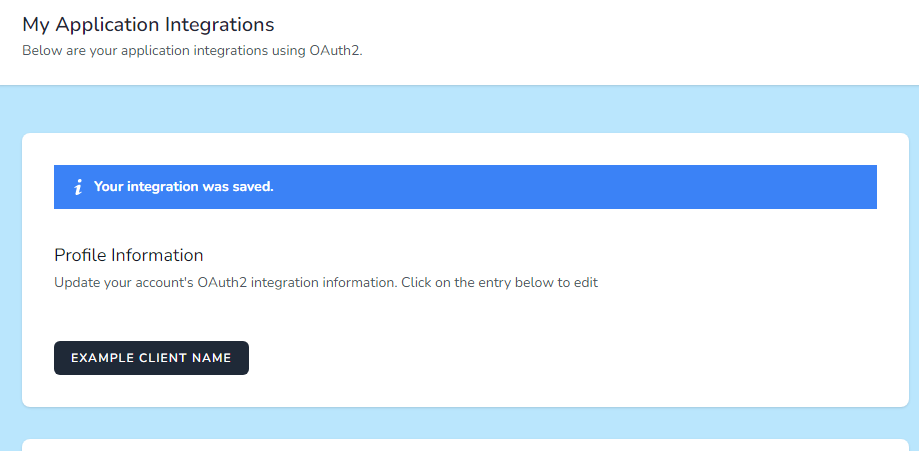
After adding, you will see a confirmation, Open the newly created application connection.
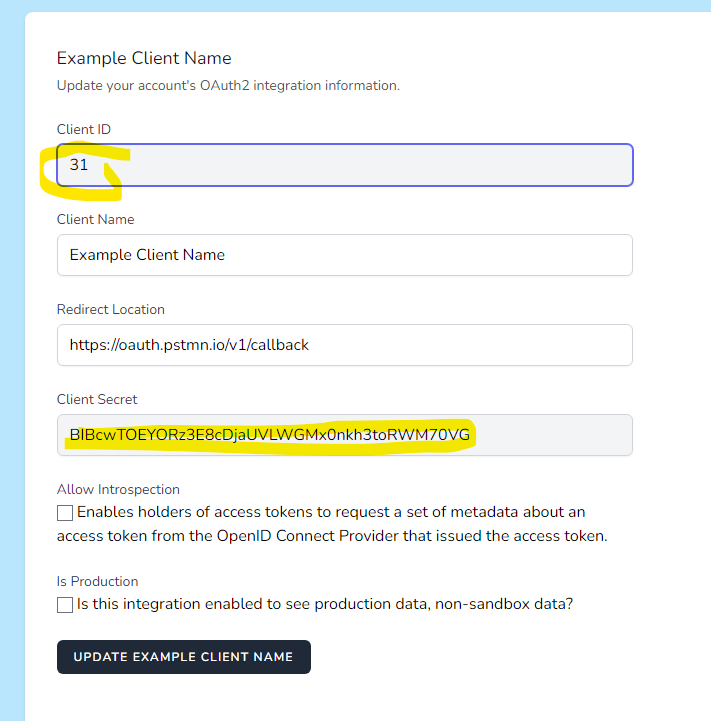
and record the client id and client secret, in this case #31 for the client id.
We will use a free, third party application called Postman (https://www.postman.com/downloads/) This tool can pull data from many web applications.
After logging in, select "Register New Application" on the main Dashboard or "My Apps" on the profile menu.
You will have three types of application you can provision. In this example, we will pick Confidential Client since we can securely store our passwords.
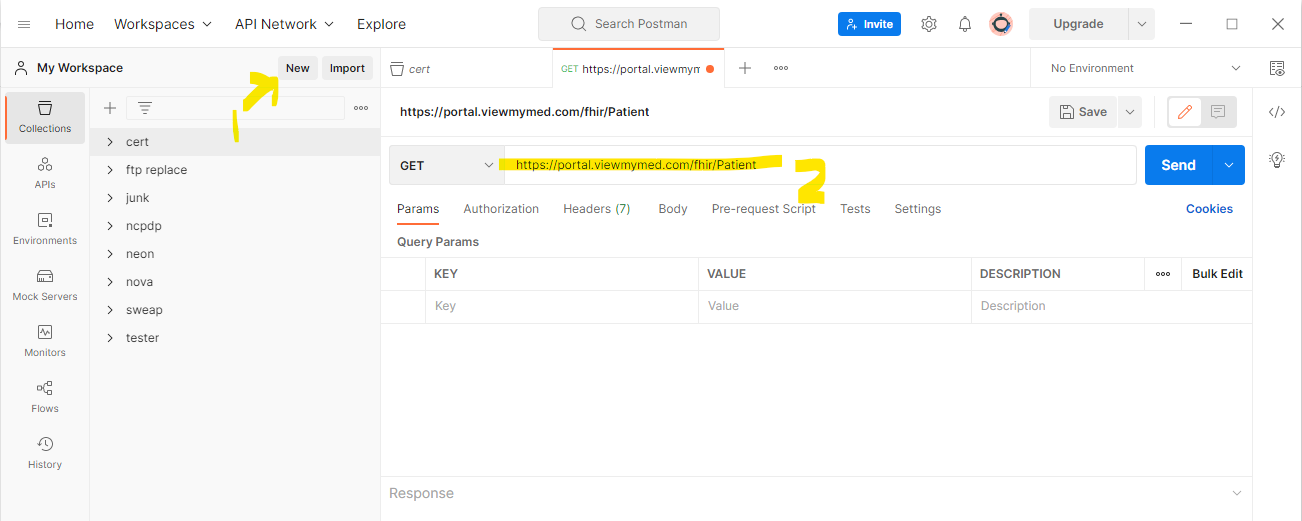
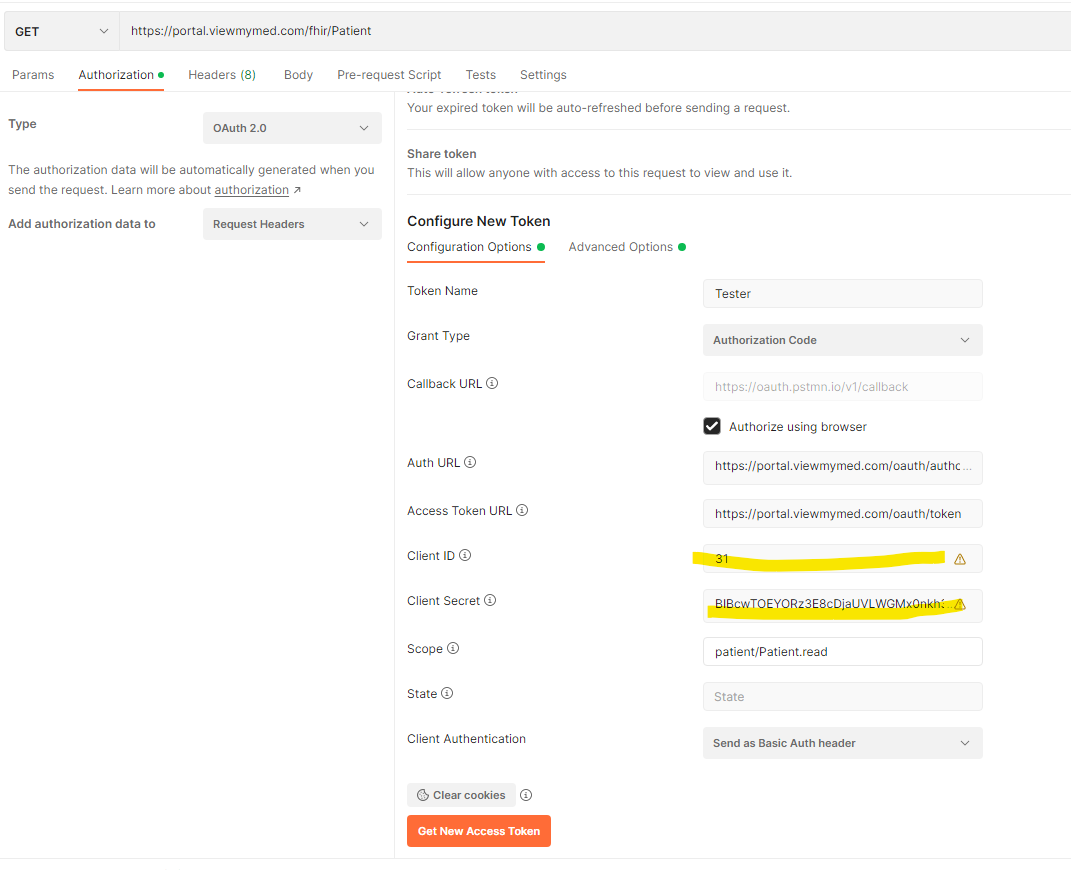
Create a new folder and HTTP request for the task at hand. In the URL we will use our Patient endpoint: https://portal.viewmymed.com/fhir/Patient
Then go over to "Authorization", select OAuth 2.0 as the method of authentication. A selection of options will appear to allow for registration.
You can now enter the details from step 1; you will want to enter 31 for the client ID, followed by BIBcwTOEYORz3E8cDjaUVLWGMx0nkh3toRWM70VG as the secret.
These two items represent the username and password for the software, so that we are aware of each other and our two applications have a trusted relationship. If your application cannot securely store such a credential, you may pick a different kind of application, from step 1.
Your integration will have a different code for your app. If you're using Postman, you may use these codes (31 and BIBcwTOEYORz3E8cDjaUVLWGMx0nkh3toRWM70VG) for testing.
For scopes, under each API page, there will be a section for Scopes. Think of this as a permission. This will be shown to your user to select from to confirm.
In this example, for Patient, the options are for user (MD office staff), patient, and system level access.For your application you will want to select the role appropriate for your end users for your app.
Since we are using our patient portal login, we will select patient/Patient.read scope for access. Additional entries are space separated. For the ability to request data while the user is not logged in you should add the scope offline_access. A full list of scopes is available here: https://build.fhir.org/ig/HL7/smart-app-launch/scopes-and-launch-context.html.
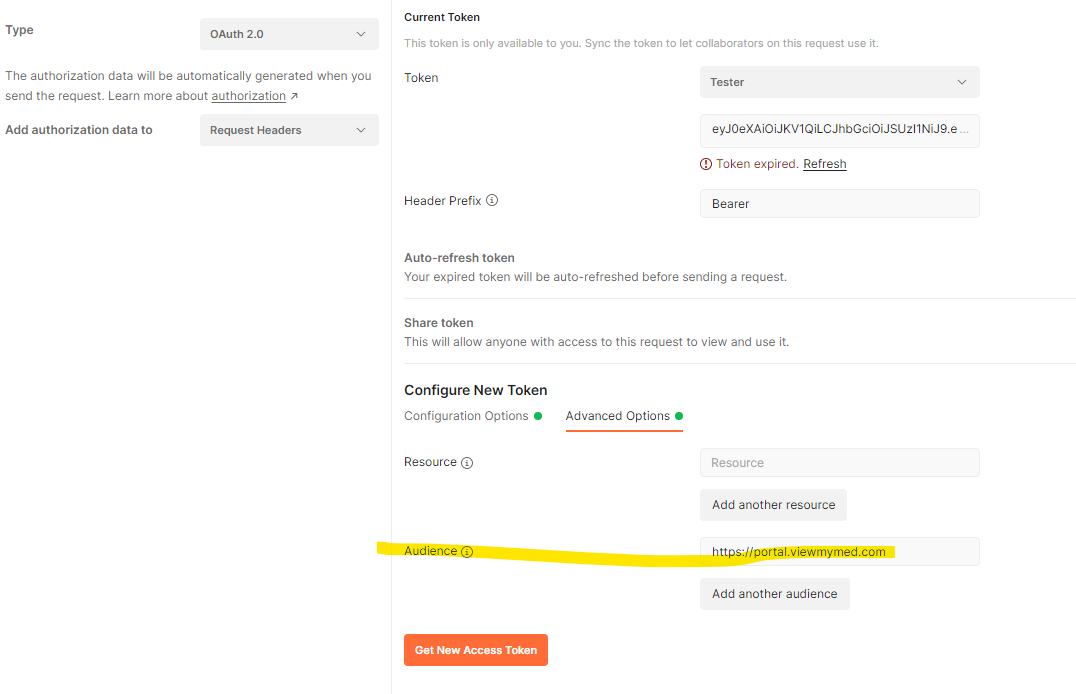
We will want to go to the advanced tab to edit the Audience, and to add the entry "https://portal.viewmymed.com". This is a security feature for FHIR to ensure the end usage of the credentials is for this portal.
As of the writing of this article, Postman has a bug where this field is not being sent; however this is necessary for your FHIR app, we wanted to point this out (and hope Postman fixes this).
Lastly, select "Get New Access Token" to continue.
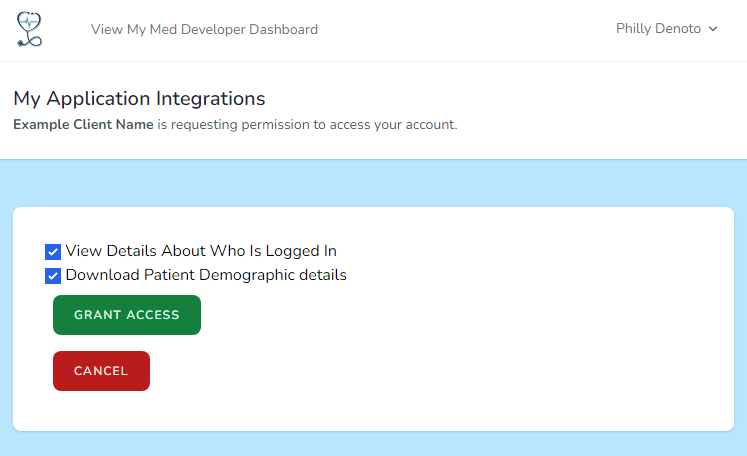
Your browser will open up, showing what permissions HST's Developer Portal allow for your application to provision. Any scope passed that isn't understood will not be allowed, and you will receive a message indicating "Invalid Scope".
In this example, we asked for patient level information.
The user can choose to grant or deny access to any section of data, your application needs to be able to accept such issues.
Let's press "Grant Access" button to continue.
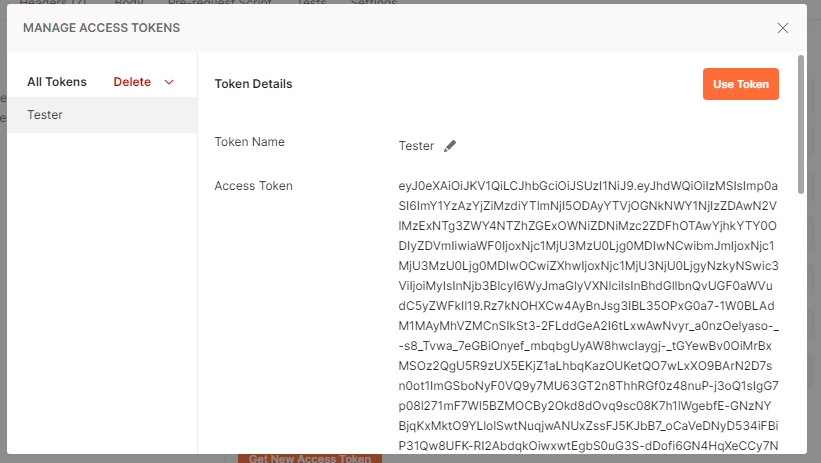
Postman will then open back up confirming that your new Bearer and Refresh tokens. This is a grant of access for your client!
Press "Use Token" to continue.
Going back to the main Postman window, you can click the blue SEND button to run the request, and after doing so, the patient data is returned on the bottom pane. As a patient, only this patient, as well as any patient they have been marked as a representative is shown in the viewer below.
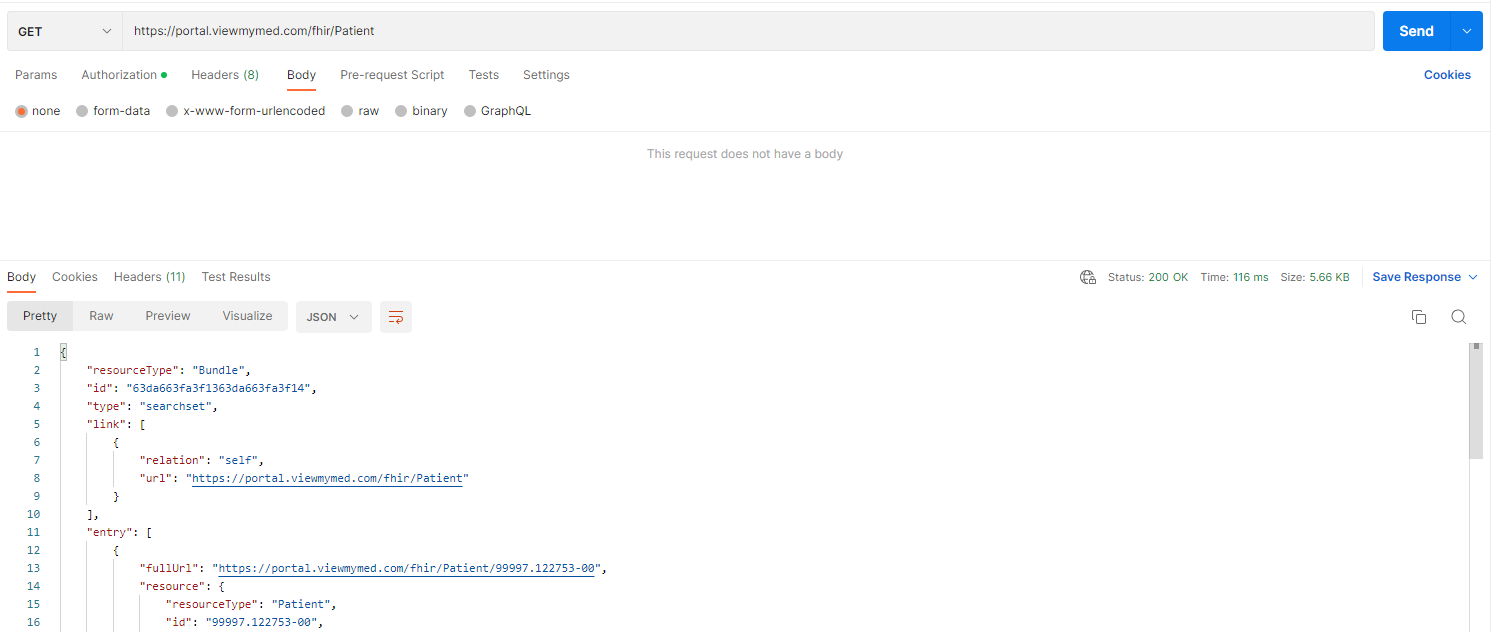
The instructions above demonstrate how you can use any OAuth 2.0 capable client software to access our software. You can create something similar using jquery, html or other off the shelf tools.
HST does not endorse any tool specifically and the examples above are for reference
We want to wish you Happy Coding!